Thursday, March 24, 2011

Reader's Favorite

Every issue of Bon Appetit has a short section called R.S.V.P./ readers' favorite restaurant recipes. It allows anyone to request their favorite dish from a specific restaurant. I'm not sure how they get chefs to give up their secrets, but they do. The March 2011 issue had five such requests. I decided to do two separate posts and cook them all.

The first request came from Cynthia Redding in Mount Pleasant, SC. She says "I absolutely love the coconut cake at Hominy Grill in Charleston. Can you get the recipe so that I could make the dessert at home?" (My daughter Katie currently lives in the area and even did a stint in Mount Pleasant, so I thought I have to try this.)

Part 1

CLASSIC COCONUT CAKE
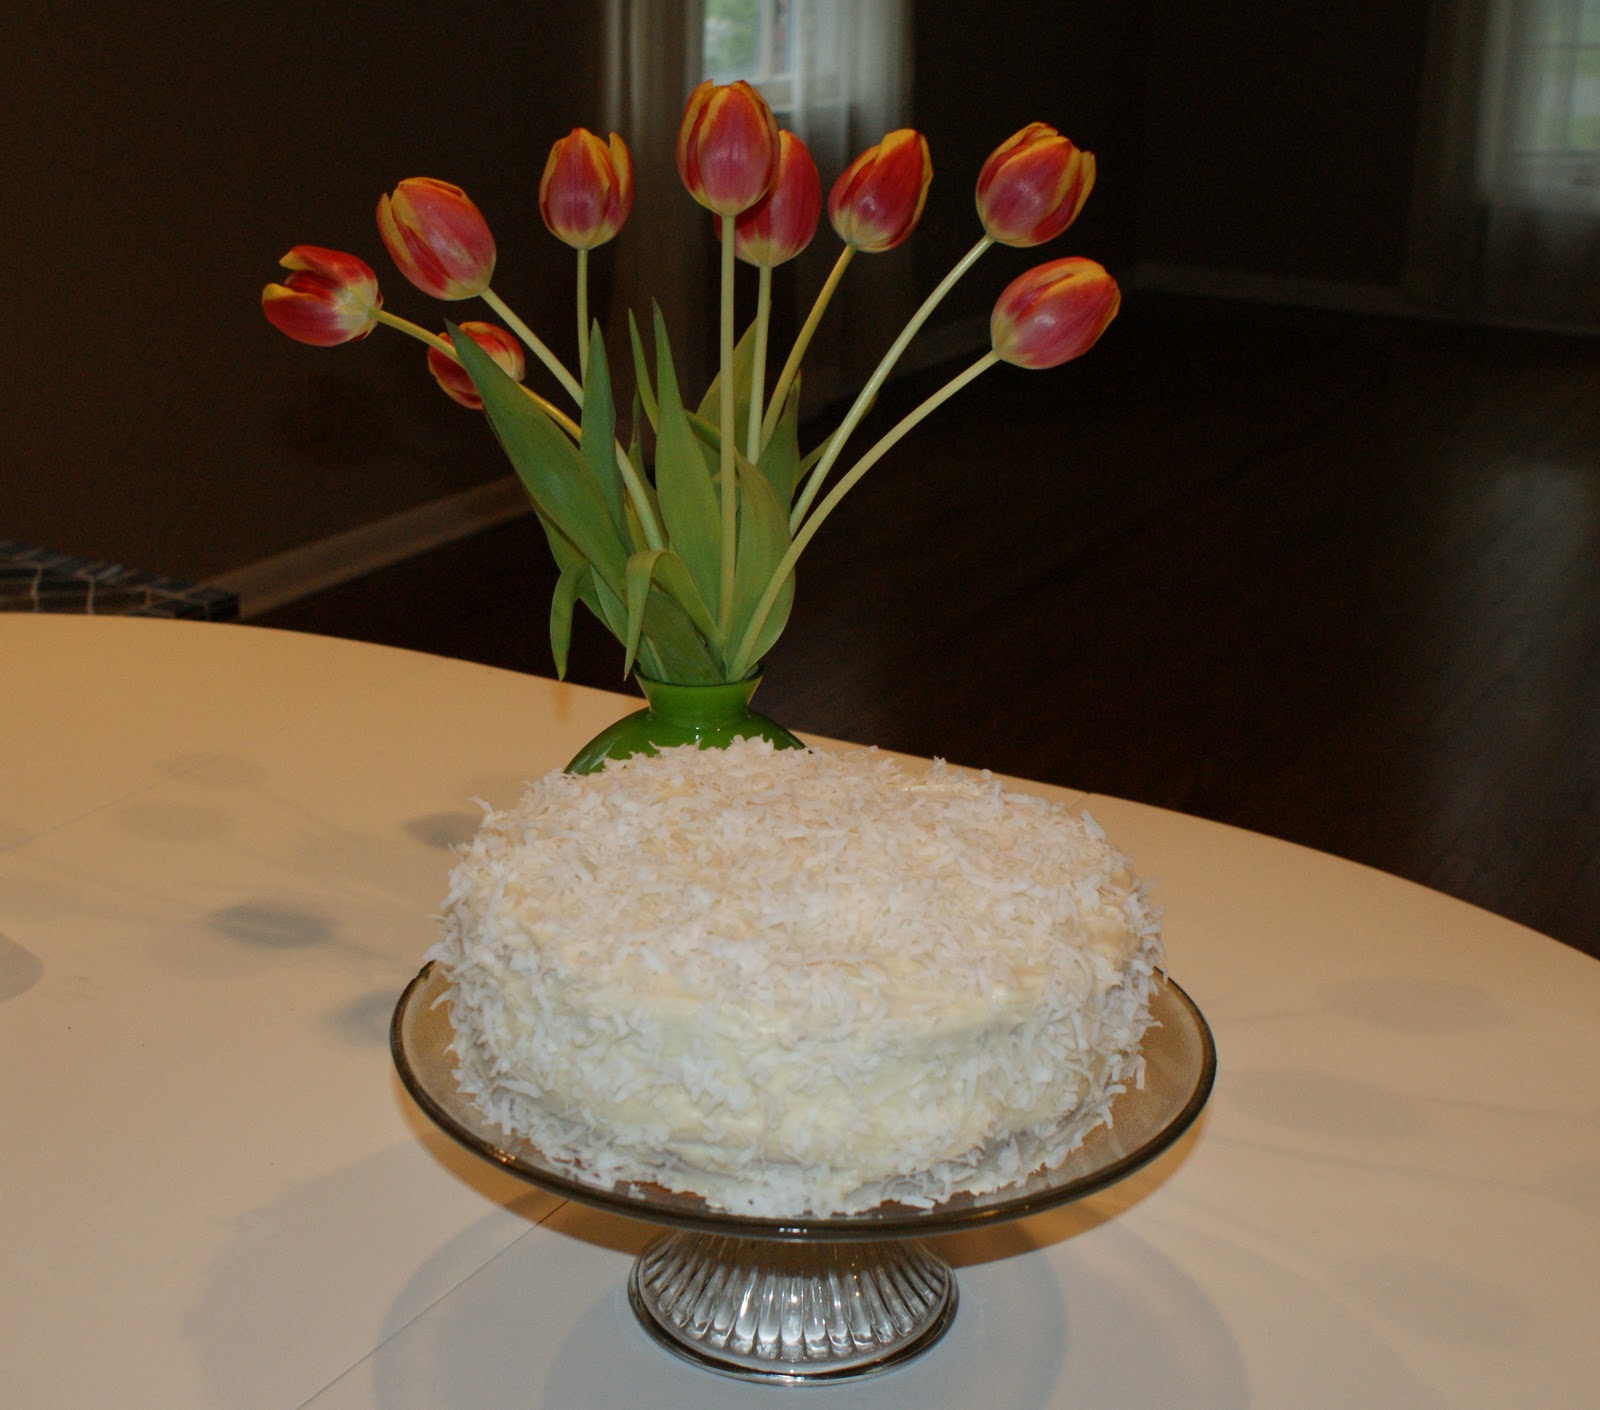
Hominy Grill's Classic Coconut Cake

PREP 30 minutes TOTAL 4 hours (includes baking and cooling time) 10 SERVINGS

Room-temperature ingredients make all the difference in this cake. You can get more loft from non-chilled egg whites, and room-temperature butter is easier to cream (beat together) with sugar than the straight-from-the-fridge stuff. The fluffy egg whites and properly creamed butter and sugar mean tender, light cake. And room-temp butter and cream cheese will translate to creamy, smooth frosting instead of a sticky mess filled with lumps.

CAKE
Nonstick vegetable oil spray
2 cups all purpose flour
1-1/3 cups (loosely packed)sweetened flaked coconut
1 cup buttermilk
1 teaspoon baking soda
2 cups sugar
1 cup (2 sticks) unsalted butter, room temperature
5 large egg yolks
4 large egg white, room temperature

FROSTING
3-1/3 cups powdered sugar
1 8-ounce package Philadelphia-brand cream cheese, room temperature
1/2 cup (1 stick) unsalted butter, room temperature
2 teaspoons vanilla extract
1 cup (about) sweetened flaked coconut

CAKE Preheat oven to 350 degrees F., Coat two 9-inch diameter cake pans with 1-1/2 inch-high sides with nonstick spray; line bottom of pans with parchment paper rounds. Mix flour and coconut in medium bowl. Whisk buttermilk and baking soda in small bowl. Using electric mixer, beat sugar and butter in large bowl until light and fluffy, about 2 minutes. Add egg yolks and beat to blend. Add flour mixture in 3 additions alternately with buttermilk mixture in 2 additions, beating just to blend after each addition. Using clean dry beaters, beat egg whites and 1/4 teaspoon salt until peaks form. Add 1/3 of egg white mixture to batter; fold into batter just to blend. Fold in remaining egg white mixture in 2 additions. Divide batter between pans.

Bake cakes until tester inserted into center comes out clean, about 35 minutes. Cool cakes in pans on racks 10 minutes. Run small sharp knife around sides of cake pans. Invert cakes onto racks. Carefully peel off parchment. Cool cakes completely.

FROSTING
Using electric mixer, beat sugar, cream cheese, butter, and vanilla in large bowl until blended. Place 1 cake layer, flat side up, on plate. Spread with 1 cup frosting. Place second layer, flat side up, atop frosting. Spread remaining frosting over top and sides of cake. Sprinkle some of the coconut on the top of the cake; pat more coconut on sides of cake.

DO AHEAD
Can be made 1 day ahead. Cover with cake dome and refrigerate. Let stand at room temperature 1 hour before serving.

This cake was delicious - moist, tender and sweet. I think it should stay refrigerated because of the cream cheese. Just make sure the slices come to room temperature before serving.

=====================================================

The next request came from Amy Madden, who lives in Kansas City, MO. She wrote "[w]hile visiting friends in California, I tried the much-talked-about Gjelina in Venice. The food definitely lived up to its reputation-especially the bacon and date scones. I'd love to serve them for brunch back home."

OK this sounded really strange to me (meat in scones?) but then again it is coming from a restaurant located in Venice, CA. which is one of the strangest places I have ever visited. After thinking about meat in scones it occurred to me that the meat was after all bacon, and as we meat eaters know bacon is good no matter what you do with it!

BACON AND DATE SCONES


PPEP 40 minutes TOTAL 3 hours 10 minutes (including chilling time) MAKES 8

Gjelina chef Travis Lett and pastry chef Meave McAuliffe have perfected this sweet-savory treat. "It's essential to work the dough as little as possible," says Lett. "If there are streaks of unincorporated butter or flour that's fine." And Lett has a serving suggestion, too. "Try them with a high-quality farmstead butter and some flaky sea salt. Lovely."

Ingredients
10 ounces thick-cut bacon slices
2 cups all purpose flour
1/2 cup sugar
1-1/2 teaspoons baking powder
3/4 teaspoon baking soda
1/2 teaspoon coarse kosher salt
3/4 cup coarsely chopped pitted Medjool dates
1/2 cup (1 stick) chilled unsalted butter
2/3 cup buttermilk
Raw sugar

Ingredient Info: Raw sugar, which is sometimes called turbinado or demerara sugar, is available at most supermarkets and at natural food stores.

Preheat oven to 400 degrees F. Line baking sheet with parchment paper. Cook bacon in heavy large skillet over medium heat until cooked through but still tender and not crisp, turning occasionally. Transfer bacon to paper towels to drain; cool. Poor bacon drippings from skillet into small heatproof bowl and reserve.

Whisk flour, 1/2 cup sugar, baking powder, baking soda, and salt in large bowl. Coarsely chop cooled bacon. Add bacon and dates to flour mixture; toss to coat. Coarsely grate butter into flour mixture. Using fork, stir in butter. Add buttermilk; stir until large moist clumps form. Using hands, knead mixture briefly in bowl until dough forms.


Transfer dough to floured work surface, Pat into 8-inch round.


Leave more room than this for expansion!
Cut into 8 wedges. Transfer scones to sheet. Cover and chill scones for 2 hours. Brush with reserved bacon drippings. Sprinkle with raw sugar.

Bake scones until golden brown and tester inserted into center of scones comes out clean, 16 to 18 minutes. Serve warm or at room temperature. DO AHEAD Can be made 8 hours ahead. Cool completely; store airtight at room temperature.

Mike and I thought these were really great, but best cooled slightly and eaten right away. We ate them with butter and strawberry jam. If you decide to make them give them plenty of room on the baking sheet to expand.

=====================================================

The last recipe request in Part 1 of this experiment came from Jeanne Schmid who lives in Alexandria, VA.  She says that "Carbana is one of my favorite restaurants in West Palm Beach. I really like the mahi-mahi with tomato-pepper sauce, which isn't on the standard menu but is often a special."

MAHI-MAHI WITH TOMATO, PEPPER, AND CAPER SAUCE


PREP 45 minutes TOTAL 2 hours 45 minutes SERVINGS  6 

To make sure there are enough fish in the sea, eat sustainable fish. The mahi-mahi in this recipe is considered a good option by the Monterey Bay Aquarium. Before you go shopping, print out or download the aquarium's Seafood Watch regional guides-and ask your fishmonger about where the seafood comes from and how it's caught.

Ingredients
16 garlic cloves, divided
1/2 cup plus 1/4 cup olive oil
6 - 8-ounce mahi-mahi or black cod fillets
Ingredients for 2
1 large white onion, halved, thinly sliced
1 large red bell pepper, thinly sliced
1 large green bell pepper, thinly sliced
1 large yellow bell pepper, thinly sliced
1 cup chopped fresh cilantro
1 cup sliced large pimiento-stuffed green olives (about 24)
4 bay leaves
2 teaspoons dried oregano leaves
1/2 cup dry white wine
1-1/2 cups crushed tomatoes with puree
1-1/2 tablespoons drained capers from jar

Puree 10 garlic cloves in mini processor; transfer to 11x7x2-inch glass baking dish. Add 1/2 cup oil, 1-1/2 teaspoons salt, and 1-1/2 teaspoons pepper to garlic; whisk marinade to blend. Add fish to marinade, cover, and chill 2 hours, turning fish occasionally.


Chop 6 garlic cloves. Heat 1/4 cup oil in skillet over medium-high heat. Add chopped garlic, onion, and next 7 ingredients. Cook until vegetables are soft, stirring often, about 15 minutes. Season sauce with salt and pepper. Add wine; stir 1 minute. Add tomatoes with puree and capers simmer 2 minutes. Season with salt and pepper.


Heat large nonstick skillet over medium-heat. Add fish to skillet with marinade still clinging. Cook until golden and just opaque in center, about 5 minutes per side.

Discard bay leaves from sauce. Divide sauce among plates. Top with fish.

I have to say the sauce is the major player in this dish. It is thick and rich with a delicious salty taste thanks to the capers and olives. The recipe divides easily. I made it for two, and I bet it easily could be made for 12. I made this same recipe last night with a boneless chicken breast and it was just as good.

Next week the readers of Bon Appetit will take us to Argentina for beef and chimichurri sauce and a side of jalapeno corn pudding.

Life is good - enjoy!

Wednesday, March 16, 2011

Sushi

My daughter Sarah has been trying to get me to go to a sushi restaurant for about seven years.  She went to school in Boston and now lives in Los Angeles. Both cities have access to wonderful sashimi, but she could never convince me that you could make an entire meal out of raw fish. I always rejected her offers for dinner at the Sushi Bars.

I recently returned from a trip to Maui, HI.  Before we left I decided to do a little research about raw fish and how it is prepared.  I knew I would see plenty of it on the menus in Hawaii, and I wanted to know what to expect.  Here is what I now know.  According to The New Food Lover's Companion written by Sharon Tyler Herbst sushi is "[a] Japanese specialty based on boiled rice flavored with a sweetened rice vinegar, a mixture called sushi meshi [SOO-shee MEH-shee]." This is the rice used in making the sushi dishes. Ms. Herbst says this is "...made by tossing freshly cooked rice with a dressing made of vinegar, sugar and salt. The rice-dressing mixture is fanned during tossing to help cool the rice quickly." Sashimi [sah-SHEE-meh] according to Herbst  is "[s]liced raw fish that is served with condiments such as shredded daikon radish or gingerroot, wasabi and soy sauce." I also discovered that the most popular types of sashimi are: Maguro / tuna, Toro / fatty tuna, Ebi / prawn, Saba / mackerel,  Ika / squid and Tako  known as octopus. According to Wikipedia "[s]ashimi grade fish is caught by individual handline. As soon as the fish is landed, its brain is pierced with a sharp spike; and it is placed in slurried ice. This spiking is called Ike Jime process. The flesh contains minimal lactic acid because it died instantly so it will keep fresh on ice for about ten days, without turning white or otherwise degrading." Ike Jime may have told you more than you ever wanted to know about sashimi, so I am going to move on to preparing sushi and sashimi and enjoying every minute of it!

While in Maui we decided to try the Hali'Maile General Store.  We had read many nice reviews of the restaurant but had also heard that it could either be a hit or a miss on any given day. Unfortunately that was the case for us - a hit for me and a miss for Mike. Although Mike didn't like his entree the one thing we both absolutely adored was the Sashimi Napoleon.  It was created by Chef Bev Gannon who shares her recipe on her blog.

Sashimi Napoleon

SASHIMI NAPOLEON
Serves 6

Ingredients:
3/4 lb. sashimi-grade ahi tuna
1 bunch radish sprouts
8 shiso leaves
1/4 lb. smoked salmon, thinly sliced
1/2 cup sliced pickled ginger for garnish
1 tbsp. tobiko (flying fish roe) for garnish
18 wonton skins

Tartare Base
2 tbsp. fine mayonnaise
2 tsp. Vietnamese garlic chili-sauce
2 tbsp. chopped green onion, white and green parts
2 tbsp. tobiko
1 tbsp. chopped cilantro

Dressing
2 tbsp. rice vinegar
2 tbsp. soy sauce
1/2 cup olive oil
2 tbsp. wasabi paste
2 tbsp. ground toasted sesame seeds
1 tsp. white miso paste

Instructions:

Cut 1/4 lb. of tuna against the grain into 12 think slices. Finely chop the other 1/2 lb. for tartare.

Wontons:
To prepare crispy wontons pour oil to a depth of 1 inch in a saucepan and heat. Add wonton skins and fry, turning once for 8 to 10 seconds on each side, until light golden brown. Keep wontons flat by using tongs to uncurl. cool on paper towels.

Dressing:
To prepare dressing combine ingredients in a bowl and mix well.

Assemble:
Roll tuna slices up into rose-shaped bundles. Reserving 2 tbsp. raddish sprouts, stack in the following order:
wonton skin
1/6 of the tartare mixture
shiso leaf
wonton skin
1/6 of the smoked salmon
radish sprouts
wonton skin
2 tuna rolls
Sprinkle the top of each napoleon with reserved radish sprouts, Drizzle 3 tbsp. of dressing around each plate. Garnish the plate with pickled ginger and tobiko.

At the restaurant the dressing was served in a small pourable pitcher.  The waiter told us to cut the entire appetizer into pieces, like a chopped salad, then drizzle with the dressing and share. This dish was truly memorable.

Enjoying our Sashimi Napoleon at Hali'Maile General Store


We also had a wonderful meal of sashimi at Mama's Fish House.  Mama's is know as the best restaurant on Maui. It's pricy, the service is excellent, the food is marvelous and the table views of the pacific are spectacular. 
Papa's Three Fish Sashimi


Papa's Three Fish Sashimi is made of three types of fish. One is called opakapaka ( a seasonal red snapper only found in the waters of Hawaii during the winter). The opakapaka is topped with coconut-chili and a serving of Molokai pink sea salt on the side. The salmon is served with a pineapple-pomegranate topping and a taste of big Island black sea salt. And lastly a serving of ahi tuna topped with star anise, shredded daikon and a pinch of kakui nut salt.
What I really liked about this dish is its simplicity.  The salt enhanced the flavor of the fish without overwhelming it, and I was amazed at the subtle differences in the fish and salts. I located a couple of the Hawaiian salts at William-Sonoma.


I TAKE A SUSHI CLASS


Chef Jeff Maiani of 310 Bistro
Before I left for Maui I heard that chef Jeff Maiani was going to offer a sushi class here in our little town of Columbus, IN. (Jeff was trained at the Culinary Institute of America and is the owner of Bistro 310. He is a truly creative and innovative chef who is willing to share some of his secrets and is an all over standup guy.) So I took the plunge and signed up for the class


What fun we had. We washed our hands, put on our aprons and were given a glass of wine. (Teachers would have more students if they followed this model!) Jeff taught us how to make the sushi meshi, how to remove the sinew from a large piece of ahi and then showed us how to make tartare. We then learned how to to make the sushi rolls and plate them so that people would be impressed with our new skill.


Here I am with a few of my classmates

After much eating and praise from Chef Jeff we all went away know that we could be a success with Sushi/Sashimi at home.

So the next time Sarah asks if I want to go eat Sushi I'm going to surprise her with a resounding YES!

Check Out Our Beautiful Rolls

Life is good - Enjoy!


  • Tuesday, March 8, 2011

    Potato Peel Pie - well, kind of...

    I belong to a book club that meets about once per month. The rules are pretty lax and that suits me fine.  Some months there are just three of us in attendance-other months several more show up. Sometimes people haven't even read the book they just show up for the social time - I like that too. The general rule is if you select the book you host the meeting.  There is always some wine to drink and some food to eat. One participant, Bonnie, is an incredible planner, blogger, mother, wife and cook and always serves a beautiful table. Our leader Stacy, a professional photographer, wife, and dog breeder lives way out in the country and builds bon-fires for us to discuss our latest read. Robin, my girl friend, mother and recent returnee to the work world has a husband/chef who owns a fabulous restaurant, here in town, where we can all meet.  I'm really not sure if it is a club that is about books or a club that is about food, but I have come to realize that it is a club about friends.

    February was my month to host. I had selected  The Guernsey Literary and Potato Peel Pie Society written by Mary Ann Shaffer and Annie Barrows. The book is a delightful read and tells a fictional story about the lives of folks living and held against their will by the Germans during World War II. It speaks about their hard lives and lack of food and how they had to make something out of nothing to keep from starving to death.  The potato peel pie is one such dish.  After a bit of research I found this pie is as fictional as the characters in the book.  If you did try to create it the taste would be a bit like wallpaper paste.

    The February 2011 issue of Cuisine at home magazine featured a one-skillet meal called the Grape Pickers' Skillet that I thought might be a good stand in for the potato peel pie. As you will see it has plenty of potatoes, but also includes cheese, onions and bacon-there is no taste of paste here!


    Grape Pickers' Skillet
    with chicken

    Makes 8 servings
    Total time: about 1-3/4 hours

    Line:
    10 oz. bacon strips
    2 Tbsp. minced fresh thyme

    Layer:
    2 lb. Yukon gold potatoes, peeled and thinly sliced
    3/4 cup shaved Gruyere cheese, divided
    Salt and black pepper
    1-1/2 cup cooked shredded chicken
    1 cup leeks
    1 Tbsp. minced garlic

    Preheat oven to 450 degrees
    Line an 8-inch cast-iron skillet with bacon, covering the bottom and the sides and leaving a third of each strip hanging over the sides. Sprinkle thyme over bacon. (This looks like spokes on a wheel.)
    Layer half the potatoes onto bacon and thyme, covering the entire surface. Sprinkle 1/4 cup Gruyere over potatoes; season with salt and pepper. Repeat layering with chicken and 1/4 cup Gruyere. Continue layering with leeks, garlic, remaining potato slices, salt and pepper, and remaining Gruyere.
    Fold hanging pieces of bacon strips to the center of the skillet, covering entire top. Transfer skillet to stove top and cook over medium heat, 10 minutes.
    Cover skillet with foil, transfer to oven and roast 30 minutes. Remove foil and roast until bacon is crisp and potatoes are fork-tender, 30 minutes more. Let meal rest 10 minutes, then drain drippings and loosen edges to serve.

    According to Cuisine the Grape Pickers' Skillet was "[n]amed for the peasant dish of layered potatoes encased in bacon [and]... was a favorite of grape pickers in France's Burgundy region." True or not this is a delicious meal for either breakfast, lunch or dinner and if you have some leftover will reheat nicely. Life is good - enjoy!

    Followers